Getting Started with AWS Amplify. Building Auth and Rest APIs using Amplify and REACT.
All you need to know about creating serverless web applications

What is Amplify?
"All the code you'll ever write is business logic" . This was said at an AWS summit in Canberra. Quite frankly, AWS has kept to this promise with the introduction of Amplify. That being said, Amplify is a set of tools that help front-end and mobile developers create scalable full-stack applications. Yes! you heard correctly FULL-STACK applications. Amplify helps you configure your backend, connect your app, and deploy it within minutes. Amplify supports a rich array of frameworks and libraries like React, Angular, Vue, Next and mobile platforms like Android, IOS, React-Native, Ionic, Flutter.
what services does amplify provide?
Practically everything you would need in the backend. But, I'll will give a complete list of all services.
API(including database)
Authentication
Data
Analytics
Storage
Messaging
Chat
AI/ML Predictions. and so much more.
Amplify CLI
The CLI is to Amplify as the darkroom is to photographs(at least in the old days). The CLI is at the heart of the Amplify experience helping you configure your app and even write some of the code for you. The CLI helps you use any of the Amplify services from configuring to deployment without leaving the command line.
The AWS Amplifyis am amazing tool for any developer looking to build and deploy scalable full-stack applications quickly. I have said that before right? well, don't just take word for it, lets take Amplify for a spin.
what are we building?
A to-do app using.....Nope! Remember those services Amplify offer? well, we're gonna be using two of them. AUTH and API. A basic backend won't you agree? This is going to be a simple React app for Dogs. because we all love Dogs. So lets get to it.
Prerequisites
- Node.js v12.x or later
- npm v5.x or later
- git v2.14.1 or later
- Basic knowledge of REACT.
If you have all those covered, awesome! . Next, you need to signup for an AWS account. click here to signup for an AWS account .
Done? next we go on to install brain. The Amplify CLI. To do so, Open your terminal or command line(I also prefer to call it command line lol) and run the following commands.
To install the amplify CLI globally,
npm install -g @aws-amplify/cli
Now, we're going to configure the CLI.
amplify configure
This will tell you to sign in to the console. after signing in, you'll be asked to create an IAM(Identity and Access Management) user.
Specify the AWS Region
? region:  # Your preferred region
Specify the username of the new IAM user:
? user name:  # User name for Amplify IAM user
Complete the user creation using the AWS console
Ensure the user is created with administrative access. Once the user is created, you'll be asked to provide the access and secret keys in order to connect the CLI to the newly created user.
Enter the access key of the newly created user:
? accessKeyId:  # YOUR_ACCESS_KEY_ID
? secretAccessKey:  # YOUR_SECRET_ACCESS_KEY
This would update/create the AWS Profile in your local machine
? Profile Name:  # (default)

Successfully set up the new user.
and that is it! we have successfully configured our CLI. Just incase you ran into issues while configuring yours, here's an awesome video guide by Nader Dabit..
Lets get to building!
The first thing we are going to do is to create the REACT app. So on your terminal, run
npx create-react-app my-dog-api --use-npm
after its done,
cd my-dog-api
Next, we go ahead and download two modules essential to this project. The aws amplify module and the aws amplify module for react.
npm i aws-amplify @aws-amplify/ui-react
After its installed, we are going to initialize amplify in the application by running
amplify init
This will walk us through some prompts. select your preferences or choose the default for each of them (note: the type of app we're building is javascript).
Next, we're asked if we want to use an AWS profile. If you have a profile hit yes. if not, you'll sign in using accessid and secret keys(remember those from earlier?).
Enter a name for the project (my-dog-api)

# All AWS services you provision for your app are grouped into an "environment"
# A common naming convention is dev, staging, and production
Enter a name for the environment (dev)

# Sometimes the CLI will prompt you to edit a file, it will use this editor to open those files.
Choose your default editor

# Amplify supports JavaScript (Web & React Native), iOS, and Android apps
Choose the type of app that you're building (javascript)

What JavaScript framework are you using (react)

Source directory path (src)

Distribution directory path (build)

Build command (npm run build)

Start command (npm start)

# This is the profile you created with the `amplify configure` command in the introduction step.
Do you want to use an AWS profile
After this, amplify will go on to setup your information in the cloud. This will create a directory in your project called "Amplify" which will contain all your backend files and this increases as you add more resources. For example, when we create our REST or Graph-QL Api. Amplify also creates a "aws-exports" file and updates the "git-ignore" file.
Moving on.. Lets get to the meaty parts. First off, we'll be adding our first backend resource which will be the Cognito user pool to handle user authentication. we do this by running the following command on the terminal.
amplify add auth
This will prompt us different options but we will be going with the default configuration. Next we're asked how we want users to sign-up, we'll go with 'username'.
? Do you want to use the default authentication and security configuration? Default configuration
? How do you want users to be able to sign in? Username
? Do you want to configure advanced settings?  Yes, I want to make additional changes.
when asked what attributes are required for signing up, we will go with 'Email'. I'll let you decide what capabilities you want to add. There you have it! user authentication has been added successfully to your local environment. Next, we'll push these changes to the cloud.
amplify push
That's literally it and our changes our resource will be provisioned in the cloud. Now, let's open up our application on the text editor of choice. Navigate to the src folder and open the app.js file.
Next, we delete everything inside of the header element and import the modules.
import Amplify from 'aws-amplify'
import config from './aws-exports'
import {withAuthenticator} from '@aws-amplify/ui-react'

Amplify.configure(config)
Also, wrap the authenthicator function around the 'App' export like so.
export default withAuthenticator(App)
so to test it out, lets write a simple 'Hello world' message between the header element, open the terminal in your editor and run 'npm start'. On our browser, we should the login page.
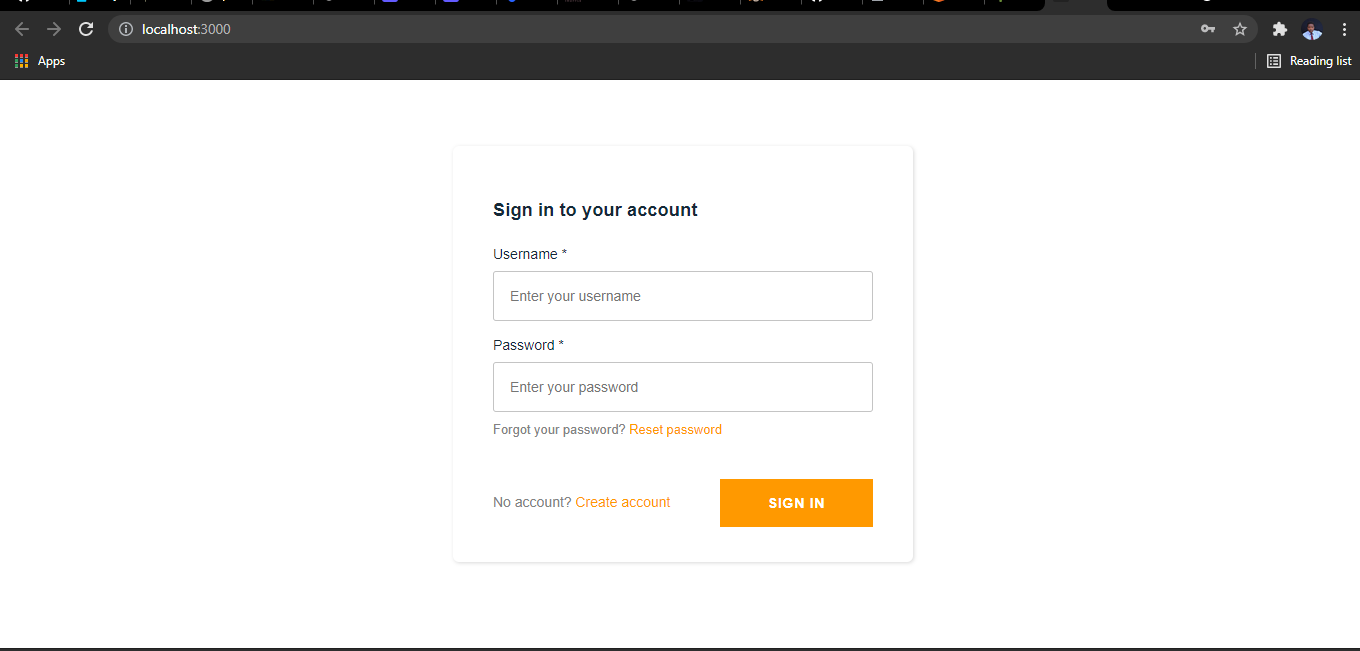
Now, we can go ahead to create an account and login. There we would see our "Hello world" response.
Conclusion
In this part, we learnt about AWS Amplify and the various services it offers we also had a step by step guide to implementing authentication using the AWS Cognito user pool. In the next part of this course, we will add a Rest Api alongside the dynamo database. You can learn more about Amplify from the official documentation. you can also follow me on Twitter


